Technical errors are rarely a welcome sight, especially if they interrupt your workflow. If you’re using XAMPP for local development, you might have run into a particularly confusing message that reads, “XAMPP error Apache Shutdown Unexpectedly”. Finding a way to quickly resolve this vague issue so you can get back to work can be frustrating.
Fortunately, troubleshooting it is often actually quite simple. All you need is a text editor to reconfigure a few simple settings in your XAMPP files. In a few moments, you can eliminate this error and get back to building your latest project.
In this article, we’ll cover what the “XAMPP error Apache shutdown unexpectedly” message means so you can better understand it. Then, we’ll take you through four simple steps to fix the problem with tools that are likely already at your disposal. Let’s dive right in!
What “XAMPP Error Apache Shutdown Unexpectedly” means
XAMPP is a powerful and popular development tool. You can use it to build a site on a local server. This is useful for creating new websites, as well as testing out changes, updates, and new plugins or themes on existing websites.
Unfortunately, this doesn’t mean that XAMPP always works perfectly. Despite being well-designed, there’s always a chance that something will go wrong. In the case of the “XAMPP error Apache shutdown unexpectedly” message, this problem can be particularly frustrating.
This warning appears when you try to boot up XAMPP. Moreover, that’s not always the only error message you’ll see. You could also receive some debugging information, such as text similar to the following:
Error: Apache shutdown unexpectedly. This may be due to a blocked port, missing dependencies, improper privileges, a crash, or a shutdown by another method. Check the "/xampp/apache/logs/error.log" file and the Windows Event Viewer for more clues.That’s a lot of information in one message. As such, it’s easy to become intimidated by all the possible causes of this issue. Furthermore, knowing how to interpret all these details can be even harder if you’re not well-versed in the relevant technology.
Fortunately, the root issue is typically pretty simple. This error message usually means that there’s another program that’s using the same port that XAMPP does by default.
A port is a network connection point used by a variety of programs. Each port only supports one program at a time. Therefore, if another application is blocking the port XAMPP typically connects to, it will prevent the platform from starting up.
Oftentimes, the culprit in this situation is Skype, as it uses the same default port as XAMPP. However, it might be another program. Trying to troubleshoot exactly which application is causing the issue can be a headache. That’s why we’ll be going straight to XAMPP’s files to fix this issue.
How to resolve the “XAMPP Error Apache Shutdown Unexpectedly” message (in 4 steps)
If you’ve never dealt with configuration files before, don’t worry. This process should be fairly simple. Additionally, all you’ll need is your XAMPP installation and a text or code editor.
Step 1: Launch the XAMPP Apache configuration settings
First, go ahead and launch the XAMPP dashboard. The program itself doesn’t have to operate. As long as you can access your dashboard, you should be able to resolve the error.
Additionally, try running XAMPP as an administrator. You can do this by right-clicking on the program and selecting Run as administrator. This isn’t crucial for this walkthrough, but it can prevent occasional unrelated errors.
Once you’ve launched XAMPP, navigate to the row titled Apache under the heading Module. Under Actions, select Config:
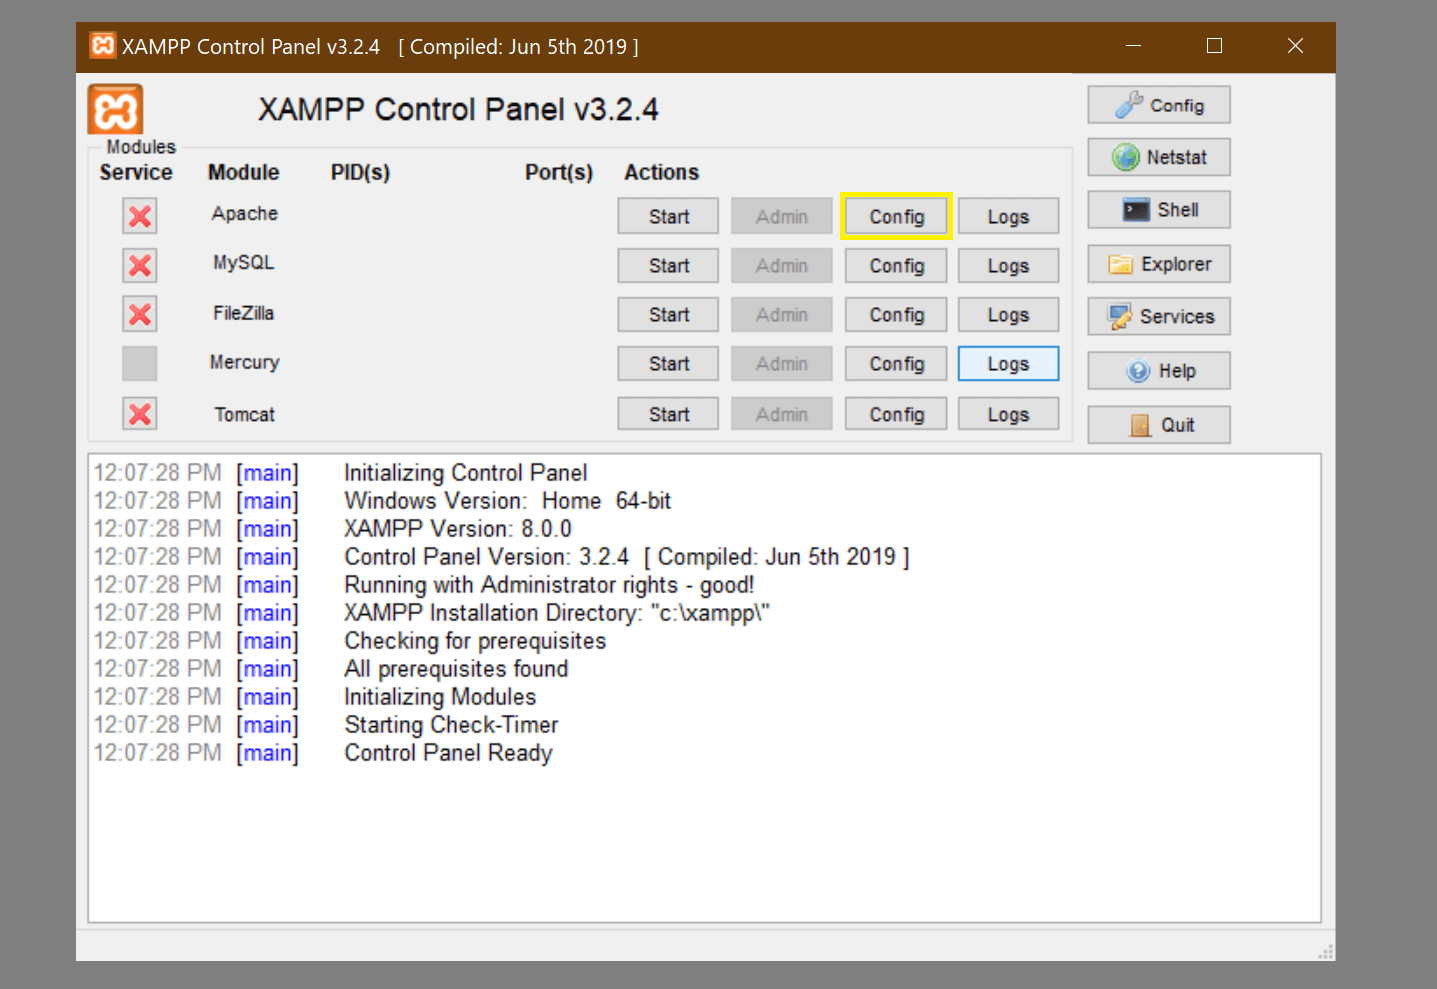
Note that when you see the “XAMPP error Apache shutdown unexpectedly” message, that means that the issue is specifically related to Apache. Therefore, you’ll need to click on that specific Config button to properly fix it. None of the other rows in this window will work.
Clicking on the Config button will open a dropdown menu listing a few file names. Each represents a configuration file for the program. Choose the first option, titled Apache (httpd.conf):
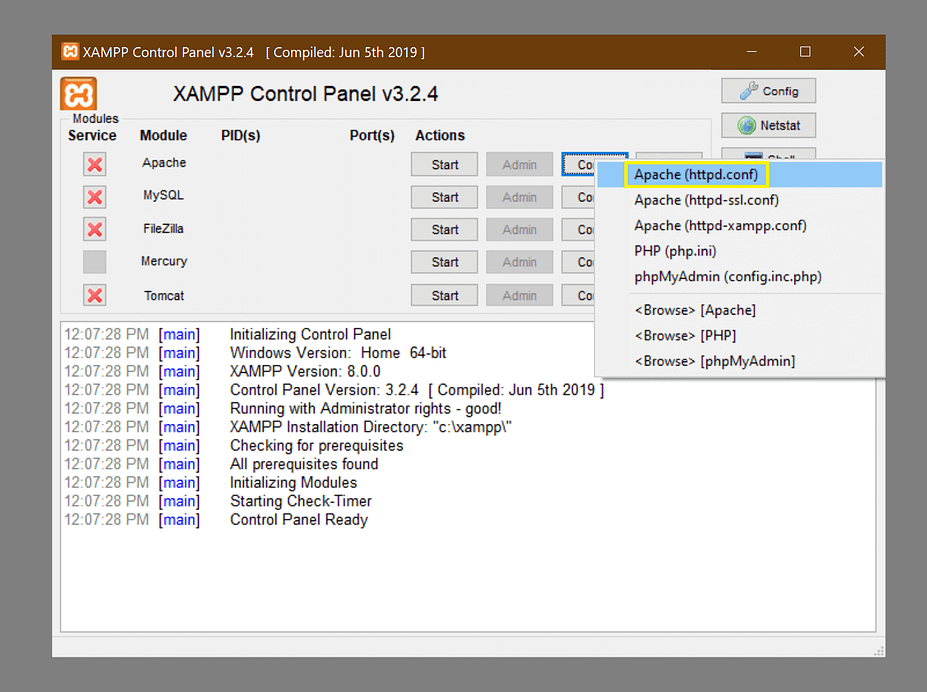
You can either open it with your default text editor, or a specialized code editor. As long as you can make changes to the file and save them, how you do so doesn’t really matter. We’ll be using Notepad.
Once you open the httpd.conf file, you’ll see some text similar to the following:
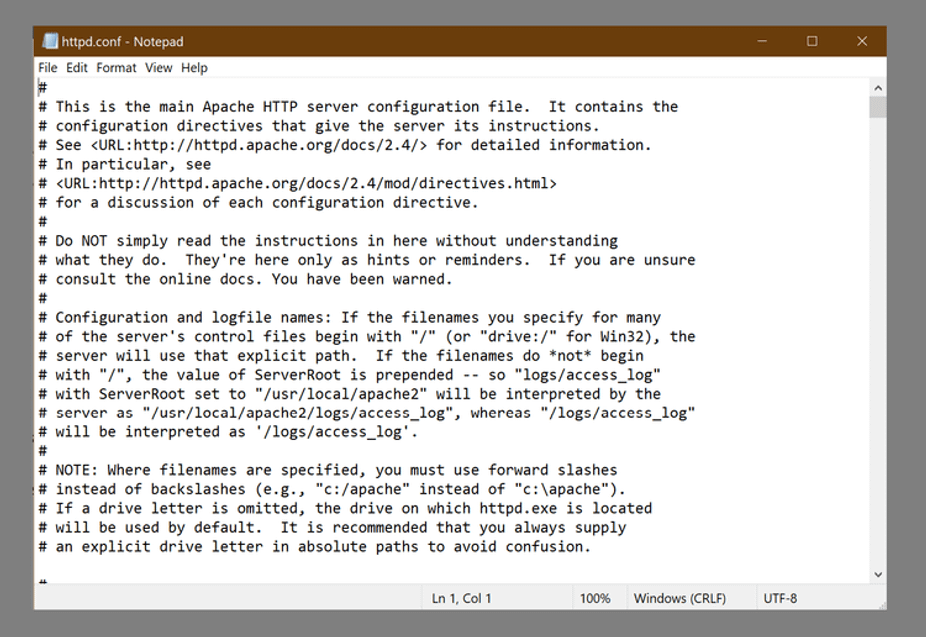
Once again, this can be a bit intimidating if you’re new to editing configuration files. The good news is that you’ll only need to modify a few simple things.
However, we do recommend that you proceed with caution. Configuration files often carry information that is essential for a program’s normal operation. Therefore, try not to edit anything that you don’t understand. You may also want to save a backup of this file before you proceed to the next step.
Step 2: Change your default port settings in httpd.conf
As we already mentioned, when you see the “XAMPP error Apache shutdown unexpectedly” message, it’s almost always a problem with a blocked port. As such, we’ll be changing the ports that the program normally uses to connect to your network.
Unless you’ve changed it before, the default port for Apache is 80. Port 80 is specifically for HTTP programs. However, it’s not just the default for Apache. Many other programs will use port 80 as well, which can lead to conflicts if you try to run multiple programs on this port at once.
To solve this issue, you need to redirect Apache to port 8080. This is an alternate HTTP-specific port. As such, XAMPP will continue to work as normal, but with less likelihood that its port will become blocked again in the future. As such, this is also a preventative measure against future port conflict errors.
Let’s get back to the configuration file. Press Ctrl + F to open a search dialogue. Enter 80 into the field to find every instance of the number in the file:

There will probably be a handful of instances where 80 occurs. However, you only need to change a few of them. Specifically, you’ll need to change three items:
- Change
Port 80toPort 8080 - Change
Listen 80toListen 8080 - Change
servername localhost: 80toservername localhost: 8080
Once again, we encourage you to only change these three items. Not only will modifying unrelated lines not solve this error, but it could also cause another one. If you accidentally edit the wrong element, you can restore your own backup or find the default Apache file on Github.
Save the httpd.conf file and close it when you’re finished making these changes. Then go back to your XAMPP control panel for the last step.
Step 3: Update your default port settings in http-ssl.conf
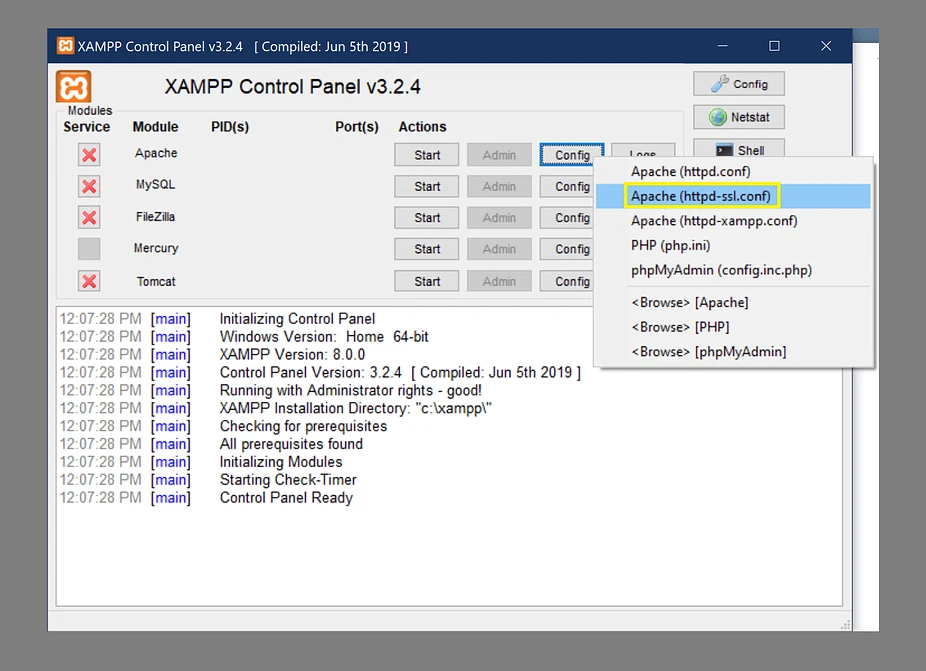
Lastly, we’ll be editing one final configuration file. To access it, repeat the instructions from Step 1. Go to the Apache row under Module and select Config. However, this time, click on the second option in the dropdown menu, titled Apache (httpd-ssl.conf):
Open up the text file in your preferred editor. However, this time you won’t be searching for 80. Instead, hit Ctrl + F and search for the number 443.
Port 443 is the port that is typically used for secure web transactions. However, Apache also needs it. Therefore, you need to change two instances of 443 to the alternative port – 4433:
- Change
Listen 443toListen 4433 - Change
<VirtualHost_default_:443>to<VirtualHost_default_:4433>
Be sure to save your work in this file as well. Once you’re done, close your text or code editor.
Step 4: Restart Apache
The next thing you want to do is restart Apache. This will reset the processes so that Apache can use the new alternate ports you’ve specified.
How to restart Apache on XAMPP
Restarting Apache is easy to do and somewhat intuitive:
- Click the Stop button on the Apache row.
- After Apache stops, click the Start button to restart it again.
If for some reason that doesn’t work, then you might need to completely shut down XAMPP and relaunch it. In most cases that shouldn’t be necessary though. The stop-start method should do the trick.
Upon restart, everything should work normally. Your control panel should look something like this:

From here, you should be able to click on Start next to Apache and continue with your work on your local site. Remember to not use ports 8080 or 4433 for any other programs, or you may have to repeat this process.
Once you have resolved this error, you may want to investigate other programs to see which one is taking up Apache’s default ports. If you decide to adjust another program’s settings to disconnect it, you can repeat these steps to reconnect XAMPP to ports 80 and 443.
Conclusion
Having to troubleshoot an error when you’re in the middle of a development project is annoying and eats up valuable time. Apache errors in particular can be aggravating. Fortunately, by altering a few configuration files, you can quickly resolve this frustrating roadblock.
In this article, we covered four easy steps to resolve the “XAMPP error Apache shutdown unexpectedly” message:
- Launch the Apache configuration settings from the XAMPP dashboard.
- Open the httpd.conf file and change the default port from
80to8080. - Open the http-ssl.conf file and change the default port from
443to4433. - Restart Apache.
Finally, if you regularly have problems with XAMPP, there are lots of other local development tools that you can consider, such as DesktopServer, Docker, or Vagrant.
Do you have any questions about resolving the “XAMPP error Apache shutdown unexpectedly” message? Let us know in the comments section below!