Want to install XAMPP and WordPress – aka. install WordPress locally? This is a great idea if you want a development site that can be used for testing or other purposes. XAMPP lets you run a website from your very own computer. And once you get it set up, you can spin up a new WordPress install with just a few clicks.
But to actually install XAMPP and WordPress can be a little tricky, so you might need a helping hand.
In this step-by-step tutorial, I’ll show you exactly how to install XAMPP and set up a local WordPress development site. I’ll also share some common XAMPP errors and troubleshooting tips so that you can fix any problems you encounter (though most people won’t experience any issues following this guide!).
At the end of this, you’ll have your very own local WordPress testing environment running on Windows.
⚡ Pro tip:
If what you’re really looking for is how to roll out WordPress for a live site, then you might want to consider going straight to a host like wpshub.com and let them handle the technical setup. wpshub.com is a web hosting firm. The way this works with them is that you select a hosting plan that fits your needs (most of the time it’s going to be the cheap plan at ₹ 330.00 / month), and then select the option to have WordPress installed on your setup automatically.
Step 1: Download and install XAMPP on your computer
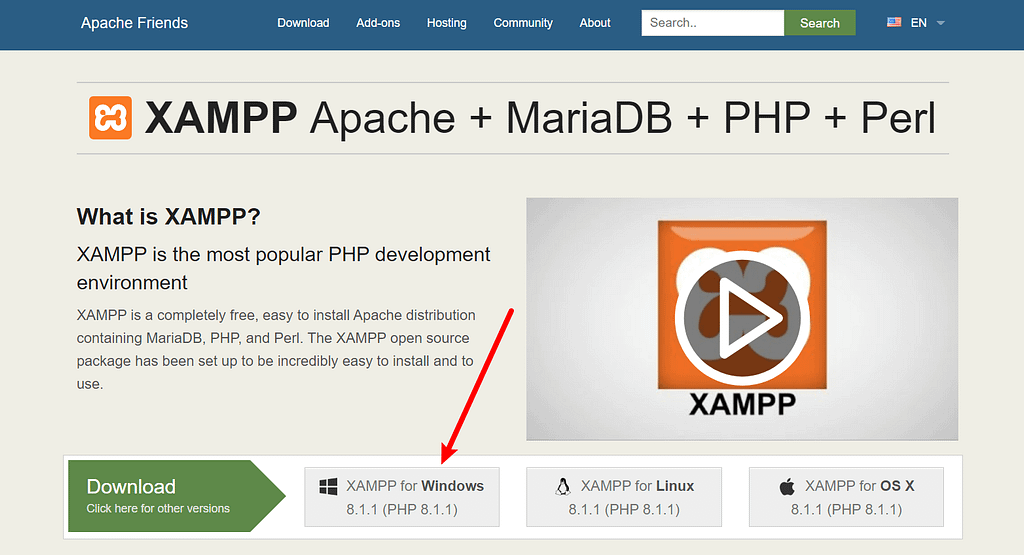
The first step on your way to install WordPress locally is to download and install the XAMPP software. You can download the Windows installer file from Apache Friends. It’s a big file, about 110 MB, so it might take a minute or so depending on your connection:
Once the download finishes, run the file you downloaded to launch the XAMPP installer. If you’re running antivirus software, you might get a warning like this:

Just click Yes to continue. Depending on your Windows configuration, you might also get a prompt about User Account Control (UAC). Just continue through that prompt as well. Once you get through all of the prompts, you should see the standard installer screen:
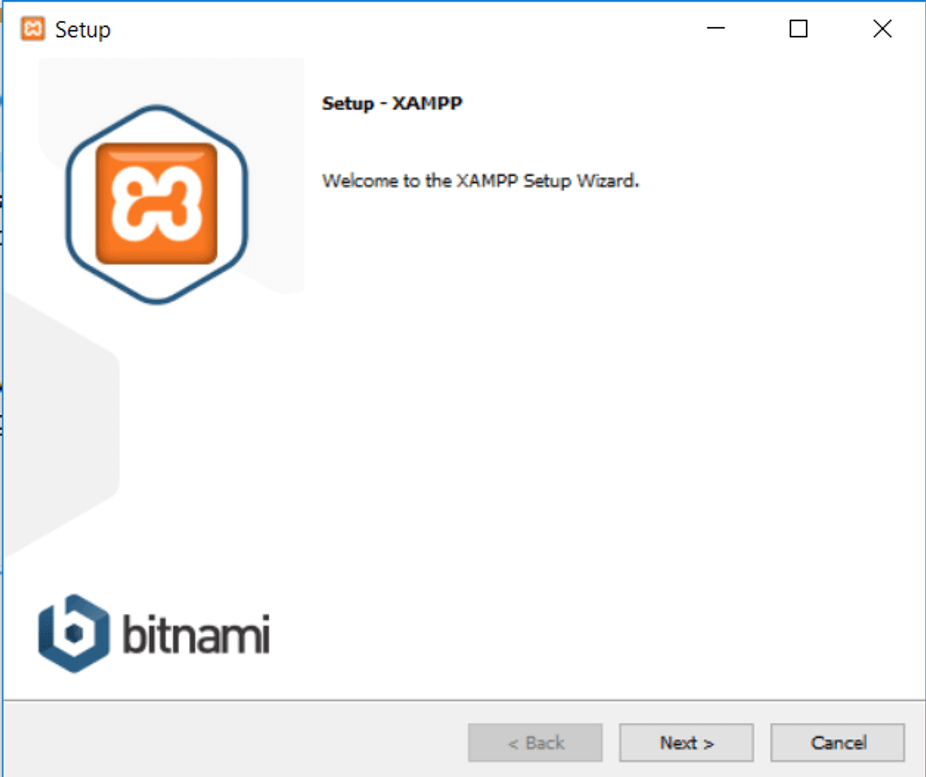
Just click Next to continue.
On the next screen, you can choose which components to install. To install XAMPP and WordPress, you do not need all of the components. In addition to the required components, all you need are:
- MySQL
- PHPMyAdmin
However, some of the other components can be useful. For example, if you want to send/debug transactional emails, you might want to install the email-related components. It’s totally up to you, though.
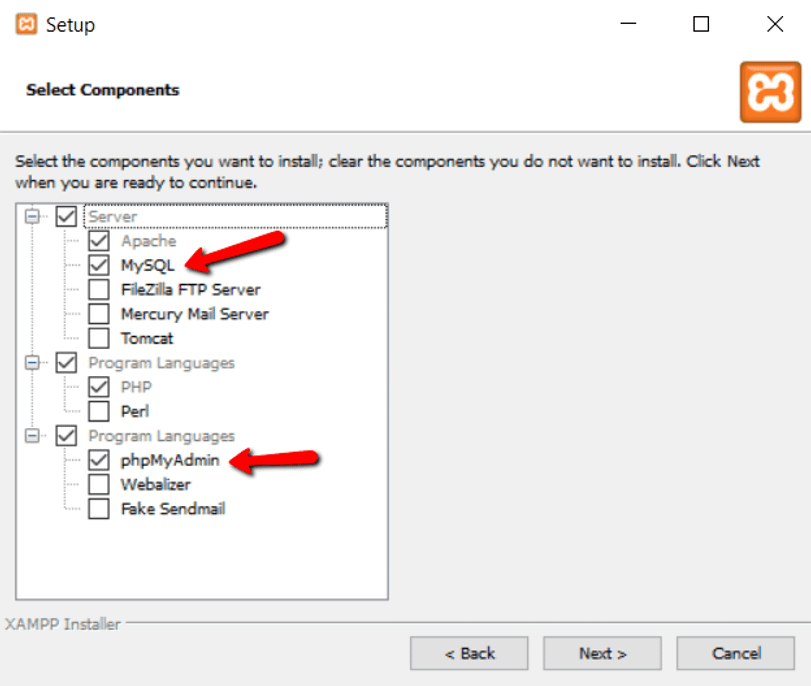
Again, this is all that’s needed to install WordPress locally. Uncheck everything else and click Next.
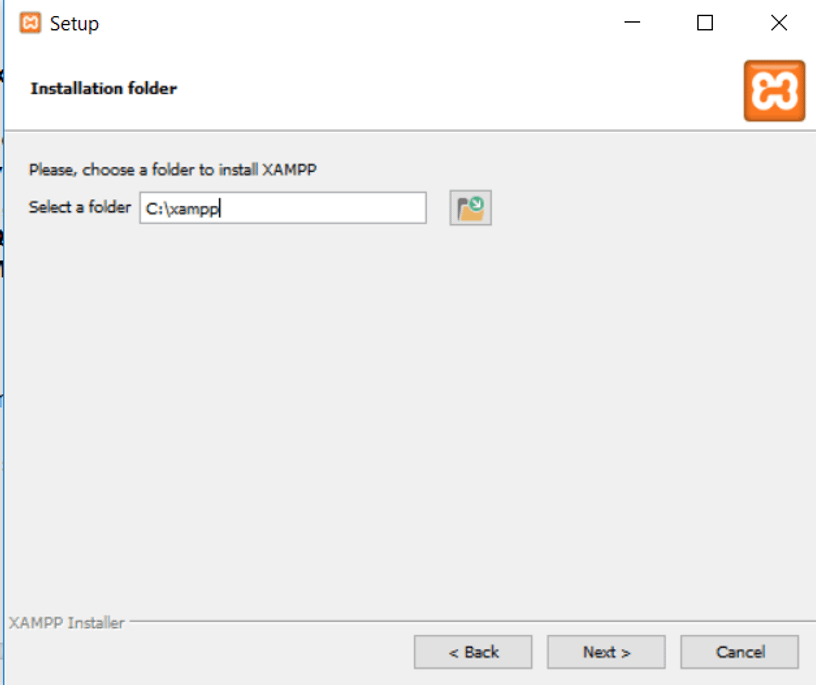
You can now select which folder to install XAMPP in. I always leave it as the default:
On the next screen, you can choose your preferred language.
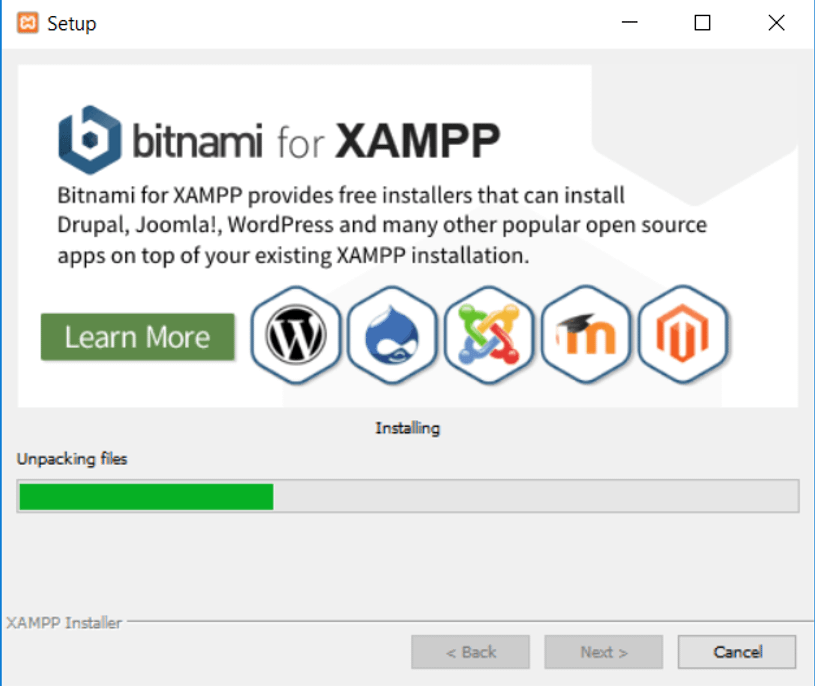
Then, you’ll get a prompt asking you to install Bitnami for XAMPP. You do not need this to install XAMPP and WordPress, so feel free to uncheck the box. If you leave it enabled, it slightly simplifies the WordPress install process, but I’m going to cover how it works without Bitnami.
Once you click Next, you’re ready to run the install:

The install process might take a few minutes:
Once it finishes, you can launch the control panel to start working with XAMPP:

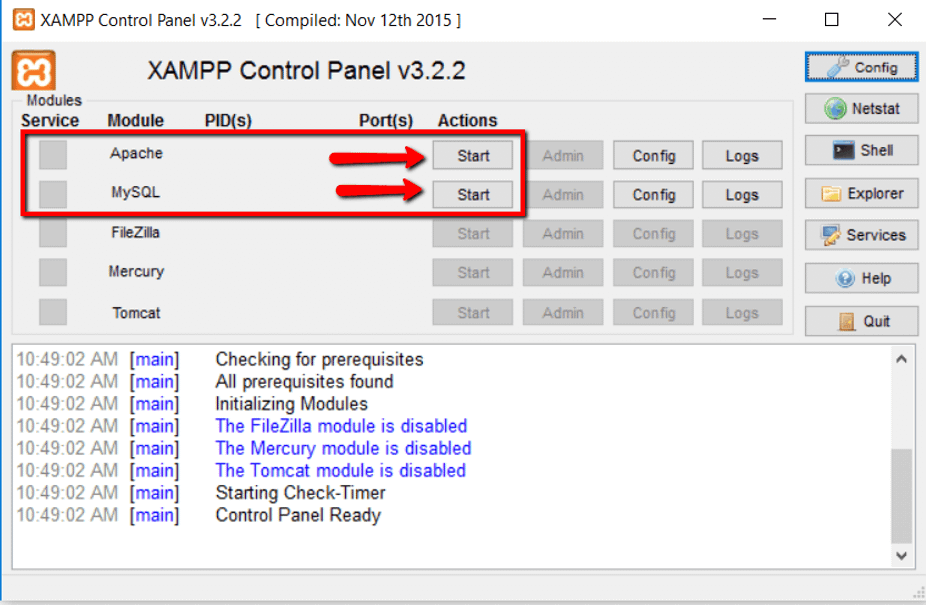
Step 2: Start the modules and test your server
To install XAMPP and WordPress properly, you’ll need to run two modules:
- Apache
- MySQL
You can start both modules from the XAMPP control panel:
Once you launch them, you should see their status turn to green:
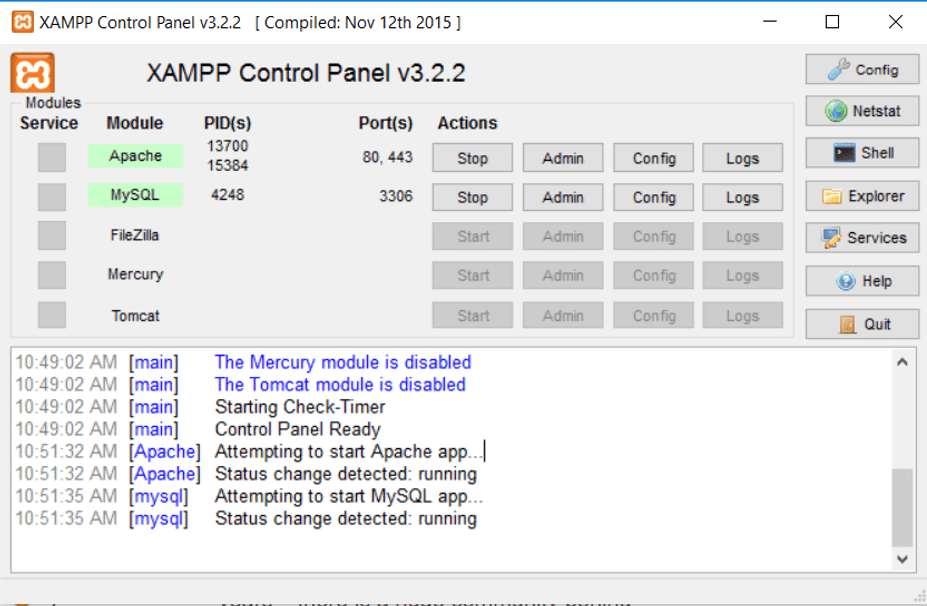
And now you should be able to test that your local server is working by going to http://localhost/ in your web browser of choice:

If all went well, you now have a functioning XAMPP server on your Windows PC! But now it’s time to install XAMPP and WordPress. So here’s how to get a WordPress site up and running on XAMPP.
Step 3: Add the WordPress files
If you’ve ever manually installed WordPress, the rest of the process should feel pretty familiar. First, you need to go to wordpress.org and download the latest version of WordPress.
Then, in Windows, navigate to the folder where you installed XAMPP. For me, that’s C://xampp. It should be something similar for you. Then, in that folder, find the htdocs subfolder:
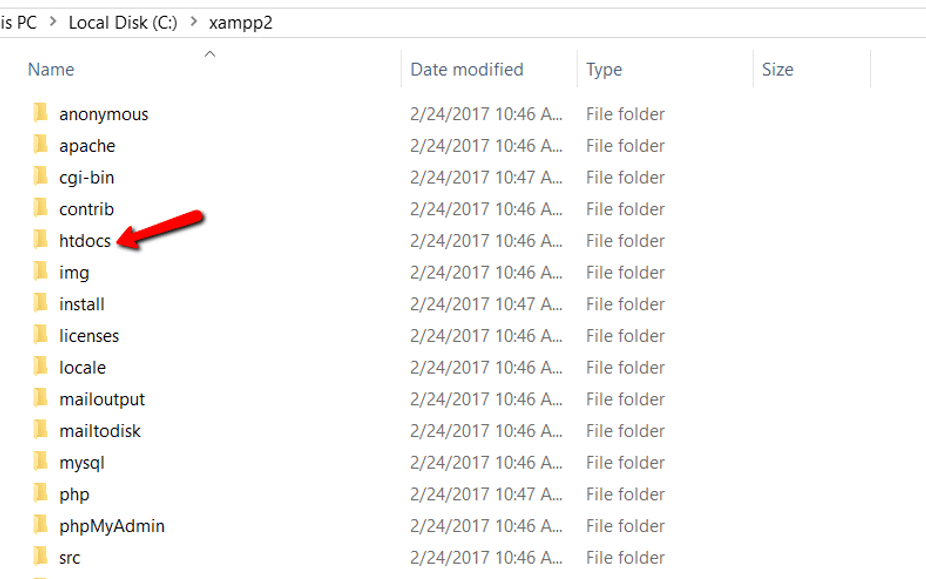
In htdocs, create a new folder for your test site. This folder name will become the sub-name used to access your site. For example, if you make the folder testsite, you’ll access your site by going to http://localhost/testsite.
Once you create the folder, extract the WordPress .zip file you downloaded from wordpress.org into it:

Step 4: Create a database for WordPress
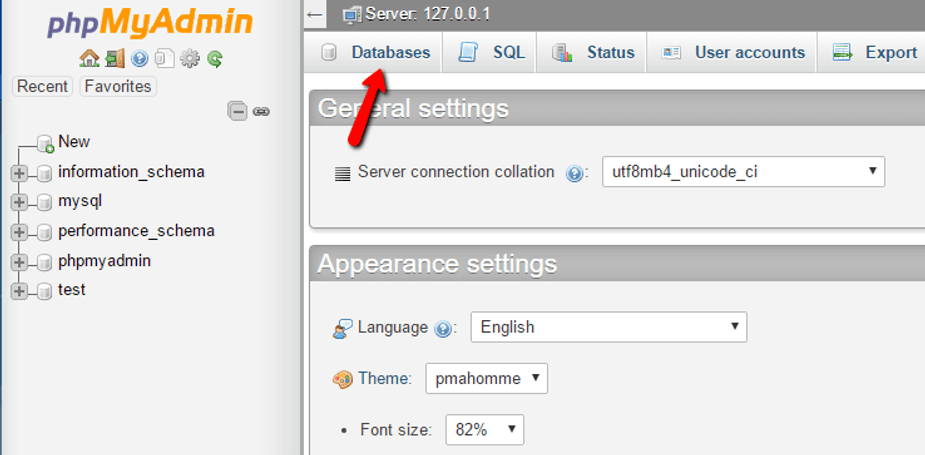
Next, you need to create a MySQL database for your WordPress install. To do that, launch PHPMyAdmin from your XAMPP control panel:

Then click on Databases at the top:
And enter a name for your database and click Create. Your name can be anything – just remember it because you’ll need it for the next step: 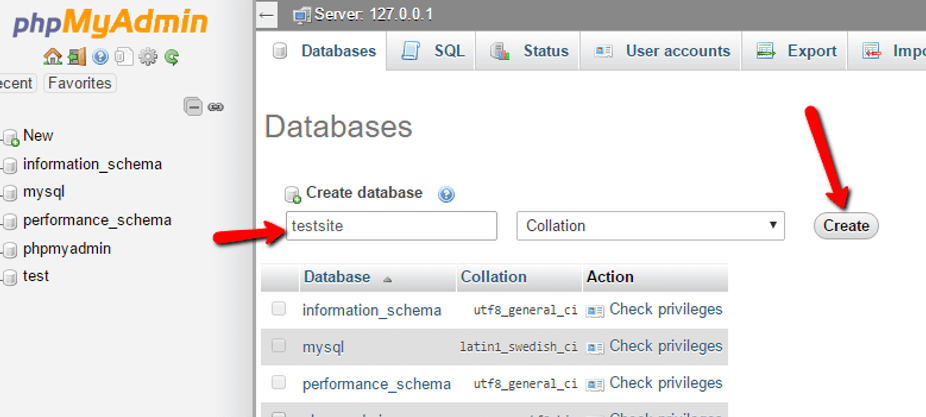
Unlike installing WordPress on a live web server, when you install XAMPP and WordPress, you don’t need to worry about creating a database user.
Step 5: Install WordPress locally via the on-screen installer
When you visit your test site, you should see the normal WordPress installer. Remember, your test site is just http://localhost/FOLDERNAME: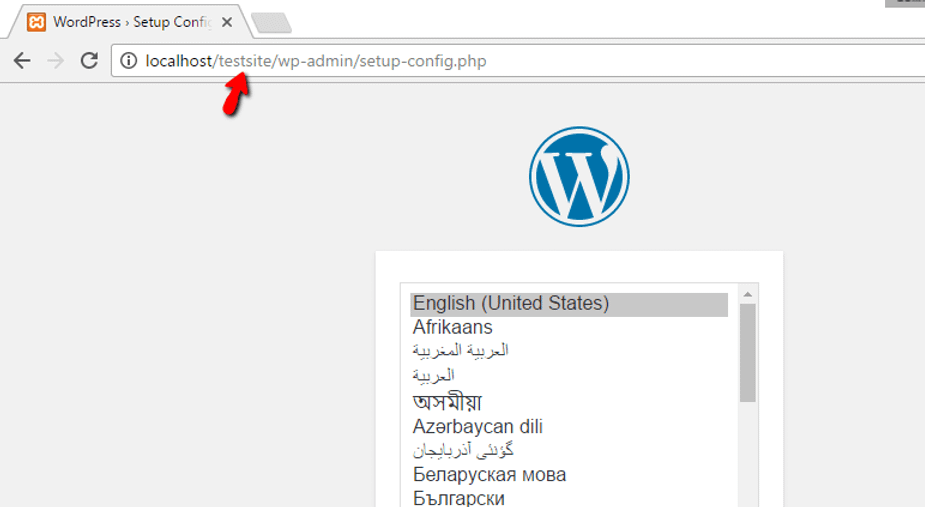
The only step where this process will differ from a normal install is the database details. When you get to the database details, enter them like this:
- Database Name = Name of the database you created in PHPMyAdmin
- Username = “root”
- Password = leave blank

Then finish the rest of the WordPress install process like normal.
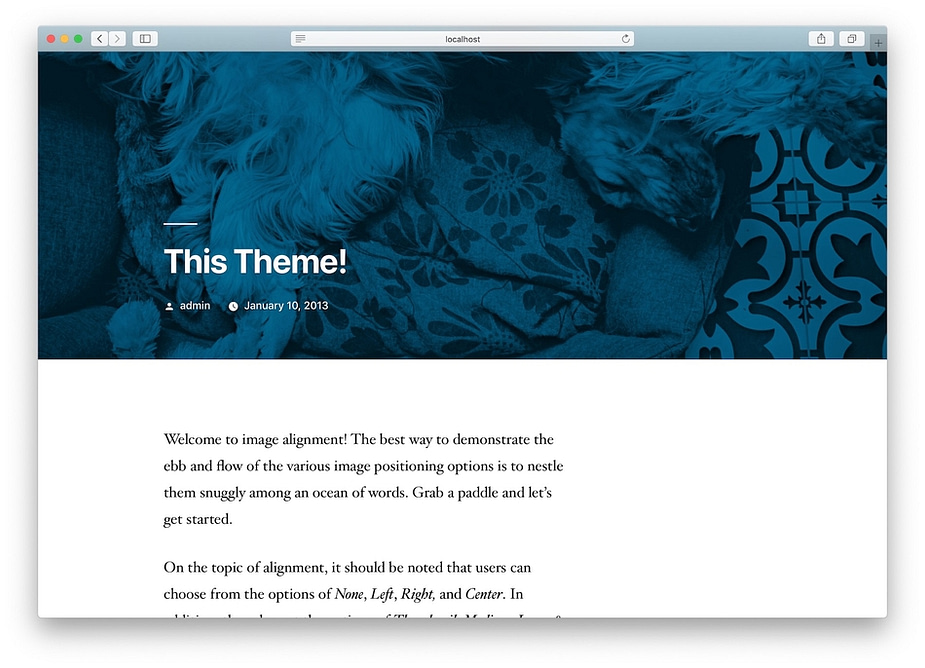
Once you complete the process, you should see your brand new WordPress install running perfectly on your local host:
Troubleshooting common XAMPP errors
If you followed our XAMPP tutorial above, you should hopefully be up and running without any issues. However, in rare cases, you might run into some XAMPP errors which require troubleshooting.
Here are some tips for fixing common XAMPP errors…
XAMPP Maximum PHP Execution Time Exceeded error
The Maximum PHP Execution Time Exceeded error is a very common issue on WordPress installs that you’ve created with XAMPP.
Thankfully, you can usually fix it just by editing a single line in one of the XAMPP configuration files.
To begin, open the XAMPP Control Panel and click the Config button next to Apache. In the dropdown list, choose the option for PHP (php.ini):

This should open the php.ini file in your default text editor.
In the file, search for the following line:
max_execution_time
You should see something like max_execution_time=120.
To fix the XAMPP Maximum PHP Execution Time Exceeded error, all you need to do is increase the value of the number. For example, you could try doubling it to 240.
XAMPP Maximum File Size Exceeded error
The Maximum File Size Exceeded error is another common problem that you might see when you try to upload files to the local WordPress site that you created with XAMPP.
Thankfully, it’s easy to fix. In fact, you can fix it from the exact same spot where you fixed the previous error – the php.ini file.
To begin, open the php.ini file (you can follow the steps in the previous section).
Then, search for the following line:
upload_max_filesize
You might see something like upload_max_filesize=40M.
To increase the upload limit and fix the error, all you need to do is increase the number. For example, you could make it upload_max_filesize=40M.
While you’re editing the php.ini file, you’ll also want to make the same change to the post_max_size number.
XAMPP Apache Shutdown Unexpectedly error
This error means that something went wrong with Apache that caused it to crash. Apache is the web server that XAMPP relies on, so a crash in Apache means your local development sites will stop working.
Because this is such a critical error, we have an entire guide on how to fix the XAMPP Apache Shutdown Unexpectedly error.
Error 403 – XAMPP access forbidden error
Another common error message is the XAMPP access forbidden error, which typically manifests as a 403 error when you try to access your database with phpMyAdmin (or sometimes other pages).
Typically, this happens because of a misconfiguration in one of the XAMPP configuration files.
To fix this, click on the Config button next to Apache in the XAMPP Control Panel.
From the dropdown, select the httpd-xampp.conf file, which should automatically open it in your default text editor.

Look for a line of code that starts with Alias /phpmyadmin.
Within that code block, you should see a line that says Require local. Change that line to say Require all granted instead.
That should fix the XAMPP database access forbidden error and give you access to phpMyAdmin.
What about multisite or staging?
How to install XAMPP and WordPress multisite
If you want to play around with WordPress multisite, it’s also possible to configure WordPress multisite to work on your local host. Rather than duplicating information, though, I’ll just direct you to Vishnu’s post on how to set up WordPress multisite on a local host.
Should you use XAMPP and WordPress for staging?
While running WordPress on your localhost is a great way to experiment and try things with WordPress, you shouldn’t use it as an actual staging site for a live site.
That’s because it has a different hardware configuration than your live site. So just because something works or doesn’t work on your XAMPP WordPress install doesn’t mean it will be the same on your live production site.
Instead, using a subdomain or your host’s staging service are much better ways to create a WordPress staging site. You can also use a dedicated WordPress staging plugin.
Wrapping things up on how to install WordPress locally on XAMPP
Once you learn how to install XAMPP and WordPress the first time, you can quickly spin up new testing sites whenever needed.
As a freelance writer, I use XAMPP installs to review any number of themes and plugins. At this point, I probably have about 60 separate WordPress installs running on XAMPP. So if you need any assistance with XAMPP and WordPress, leave a comment and I’ll try to help out!
If you’re interested in some other ways to create local WordPress development sites, we also have a lot of other useful guides:
- Using Local for local WordPress development
- Using DesktopServer for local WordPress development
- Creating Docker containers for local development
Do you still have any questions about how to install WordPress locally with XAMPP? Let us know in the comments!