Trying to figure out how to install WordPress? There are a few different methods you can use, each of which I’ll give an in-depth guide for.
By the end of this WordPress installation guide, you should be up and running with a working WordPress site and ready to start adding content.
First of all, why are there different methods for installing WordPress in the first place? The answer is simple… Because of WordPress’ popularity, there are a number of helper tools that make it easier to install the platform on different servers and hosts. As a result, there’s not simply one choice for how to install WordPress but multiple alternative ones.
In this post, I’ll give you a tutorial for each of the common methods for installing WordPress.
To give you some guidance for which method you should choose, I’ve ordered the guides from easiest to most time consuming.
So if you’re just looking for the quickest and easiest way to install WordPress, start with Method 1!
- Method #1: How to install WordPress manually via FTP
- Method #2: How to install WordPress on your own computer
- Wrapping things up
If you are looking for a summary on how to install WordPress manually, here it is:
- Download the latest version of WordPress from wordpress.org
- Unzip the file and upload it to the
public_html(or similar) directory - Create MySQL Database and User
- Configure the
wp-config.phpfile. - Run the WordPress install
Method #1: How to install WordPress manually
Start by downloading the latest version of WordPress from wordpress.org: 
Then unzip the file and upload it to the public_html (or similar) directory of your website. If you’re not sure how to log in to FTP, ask your host for your FTP account information:

While that’s going on, head over to your cPanel account and find the MySQL Databases option:

You should see an option to Create a New Database. Enter a name for your database and click Create Database:
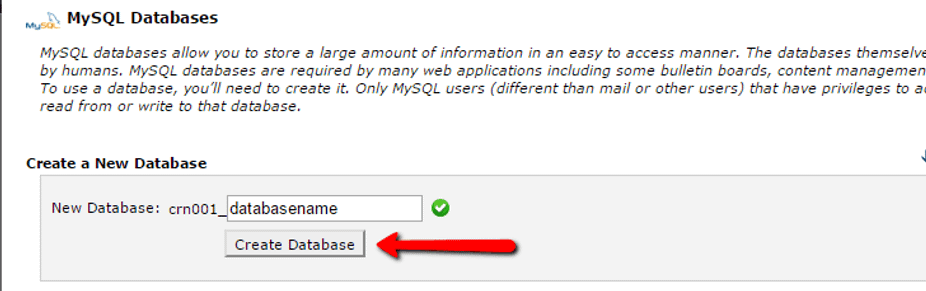
The name can be whatever you want – just make sure that you remember it. You’ll need it later on.
Next, you need to actually create a user for your database. So on that same page, scroll down to MySQL Users and create a new user:
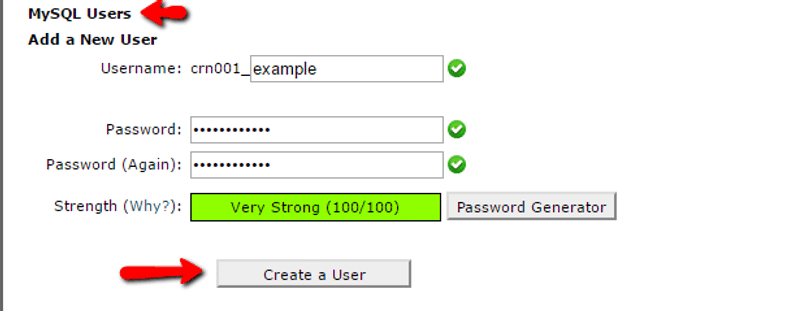
Once you’ve created the user, make sure to give it access to the database you created:
On the next page, also make sure to give that username All Privileges:

Now, assuming the FTP transfer has finished, you can go to your domain name to complete the installation process. When you visit your domain, you should see the WordPress installation wizard. First, you need to choose your language:

Then, make sure you have the details for your database name, user, and password handy. Enter them when prompted:
If all goes well, you should be able to run the WordPress install:

Give your WordPress site a title and enter the information necessary to create your admin account:
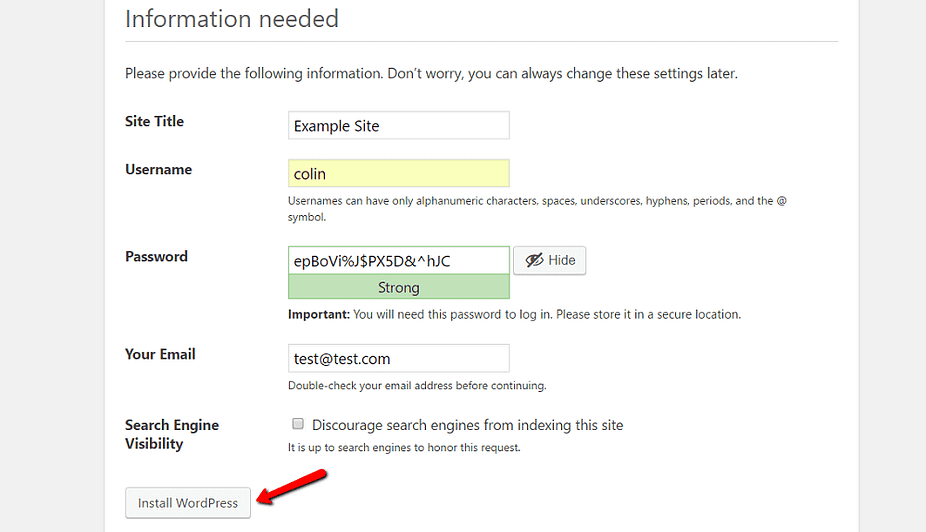
Then click Install WordPress.
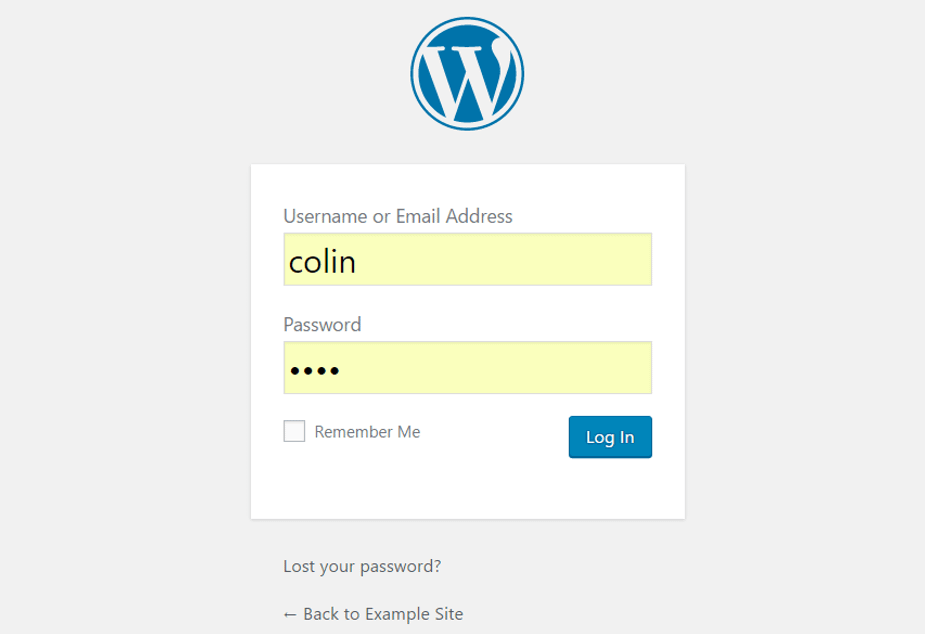
And that’s it! You just learned how to install WordPress manually in just five minutes. You can now log in with the account details that you entered during the install process:
Method #2: How to install WordPress on your own computer
If you want to create a sandbox where you can learn more about WordPress, you can install WordPress on your own computer. You’ll have a fully functioning WordPress install that you can play around with, it just won’t be accessible to anyone else.
That is, it will only be available on your own computer. This is also known as a “localhost”.
If you’re interested in such a setup, we have several guides that show you how to install WordPress “locally” using different tools: